


From Monday to Friday 09:00am - 18:00pm
How to slackline when you are a begginer ?
Published :
04/30/2021 09:36:01
Categories :
General

Summary
- Installing a slackline when you are a beginner
- At what height should a slackline be installed for a beginner?
- How long to install a slackline for a beginner?
- At what tension should a slackline be stretched for a beginner?
- Which slackline equipment should I choose for a beginner?
- My first steps on a slackline: which positions ?
- Despite all these advices, I can't make it...
--------------
Slackline is a very affordable sport, for everyone :-)
With a little bit of training, perseverance and fun, this discipline is accessible to everyone, young and old!
Here are some tips to succeed in crossing your first slackline! Or at least your first steps :-)
--------------
Installing a slackline when you are a beginner
At what height should a slackline be installed for a begginer ?
To begin with, it is advisable to put the slackline at knee height.
A slackline stretched at this height allows you to go up and down very easily and without getting tired (correct "step" height). And it avoids bad falls. It is easy to catch up.
If you are in a group or family, install the slackline at knee height of the smallest.
This low height gives a feeling of closeness to the ground when crossing, which reduces the apprehension that one can feel once standing on the slackline.
How long to install a slackline for a beginner?
Start small, to go further...
If this is your first time on a slackline, we advise you to start with a length of 4 to 5 meters. More than the tension, it is the length that determines the difficulty. The shorter the slackline is, the more stable it will be and the less effort it will take.
Whatever the length, the goal is to succeed in taking your first steps, then to cross it. Staying in place without succeeding in moving forward (because the slackline is too long and therefore too difficult for your current level), will not help you learn anything.
Once you have mastered the back and forth with a turn, you can gradually increase the distance to 8 meters, then 10 meters, then 15 meters, then ... Sky is the only limit !
At what tension should a slackline be stretched for a beginner?
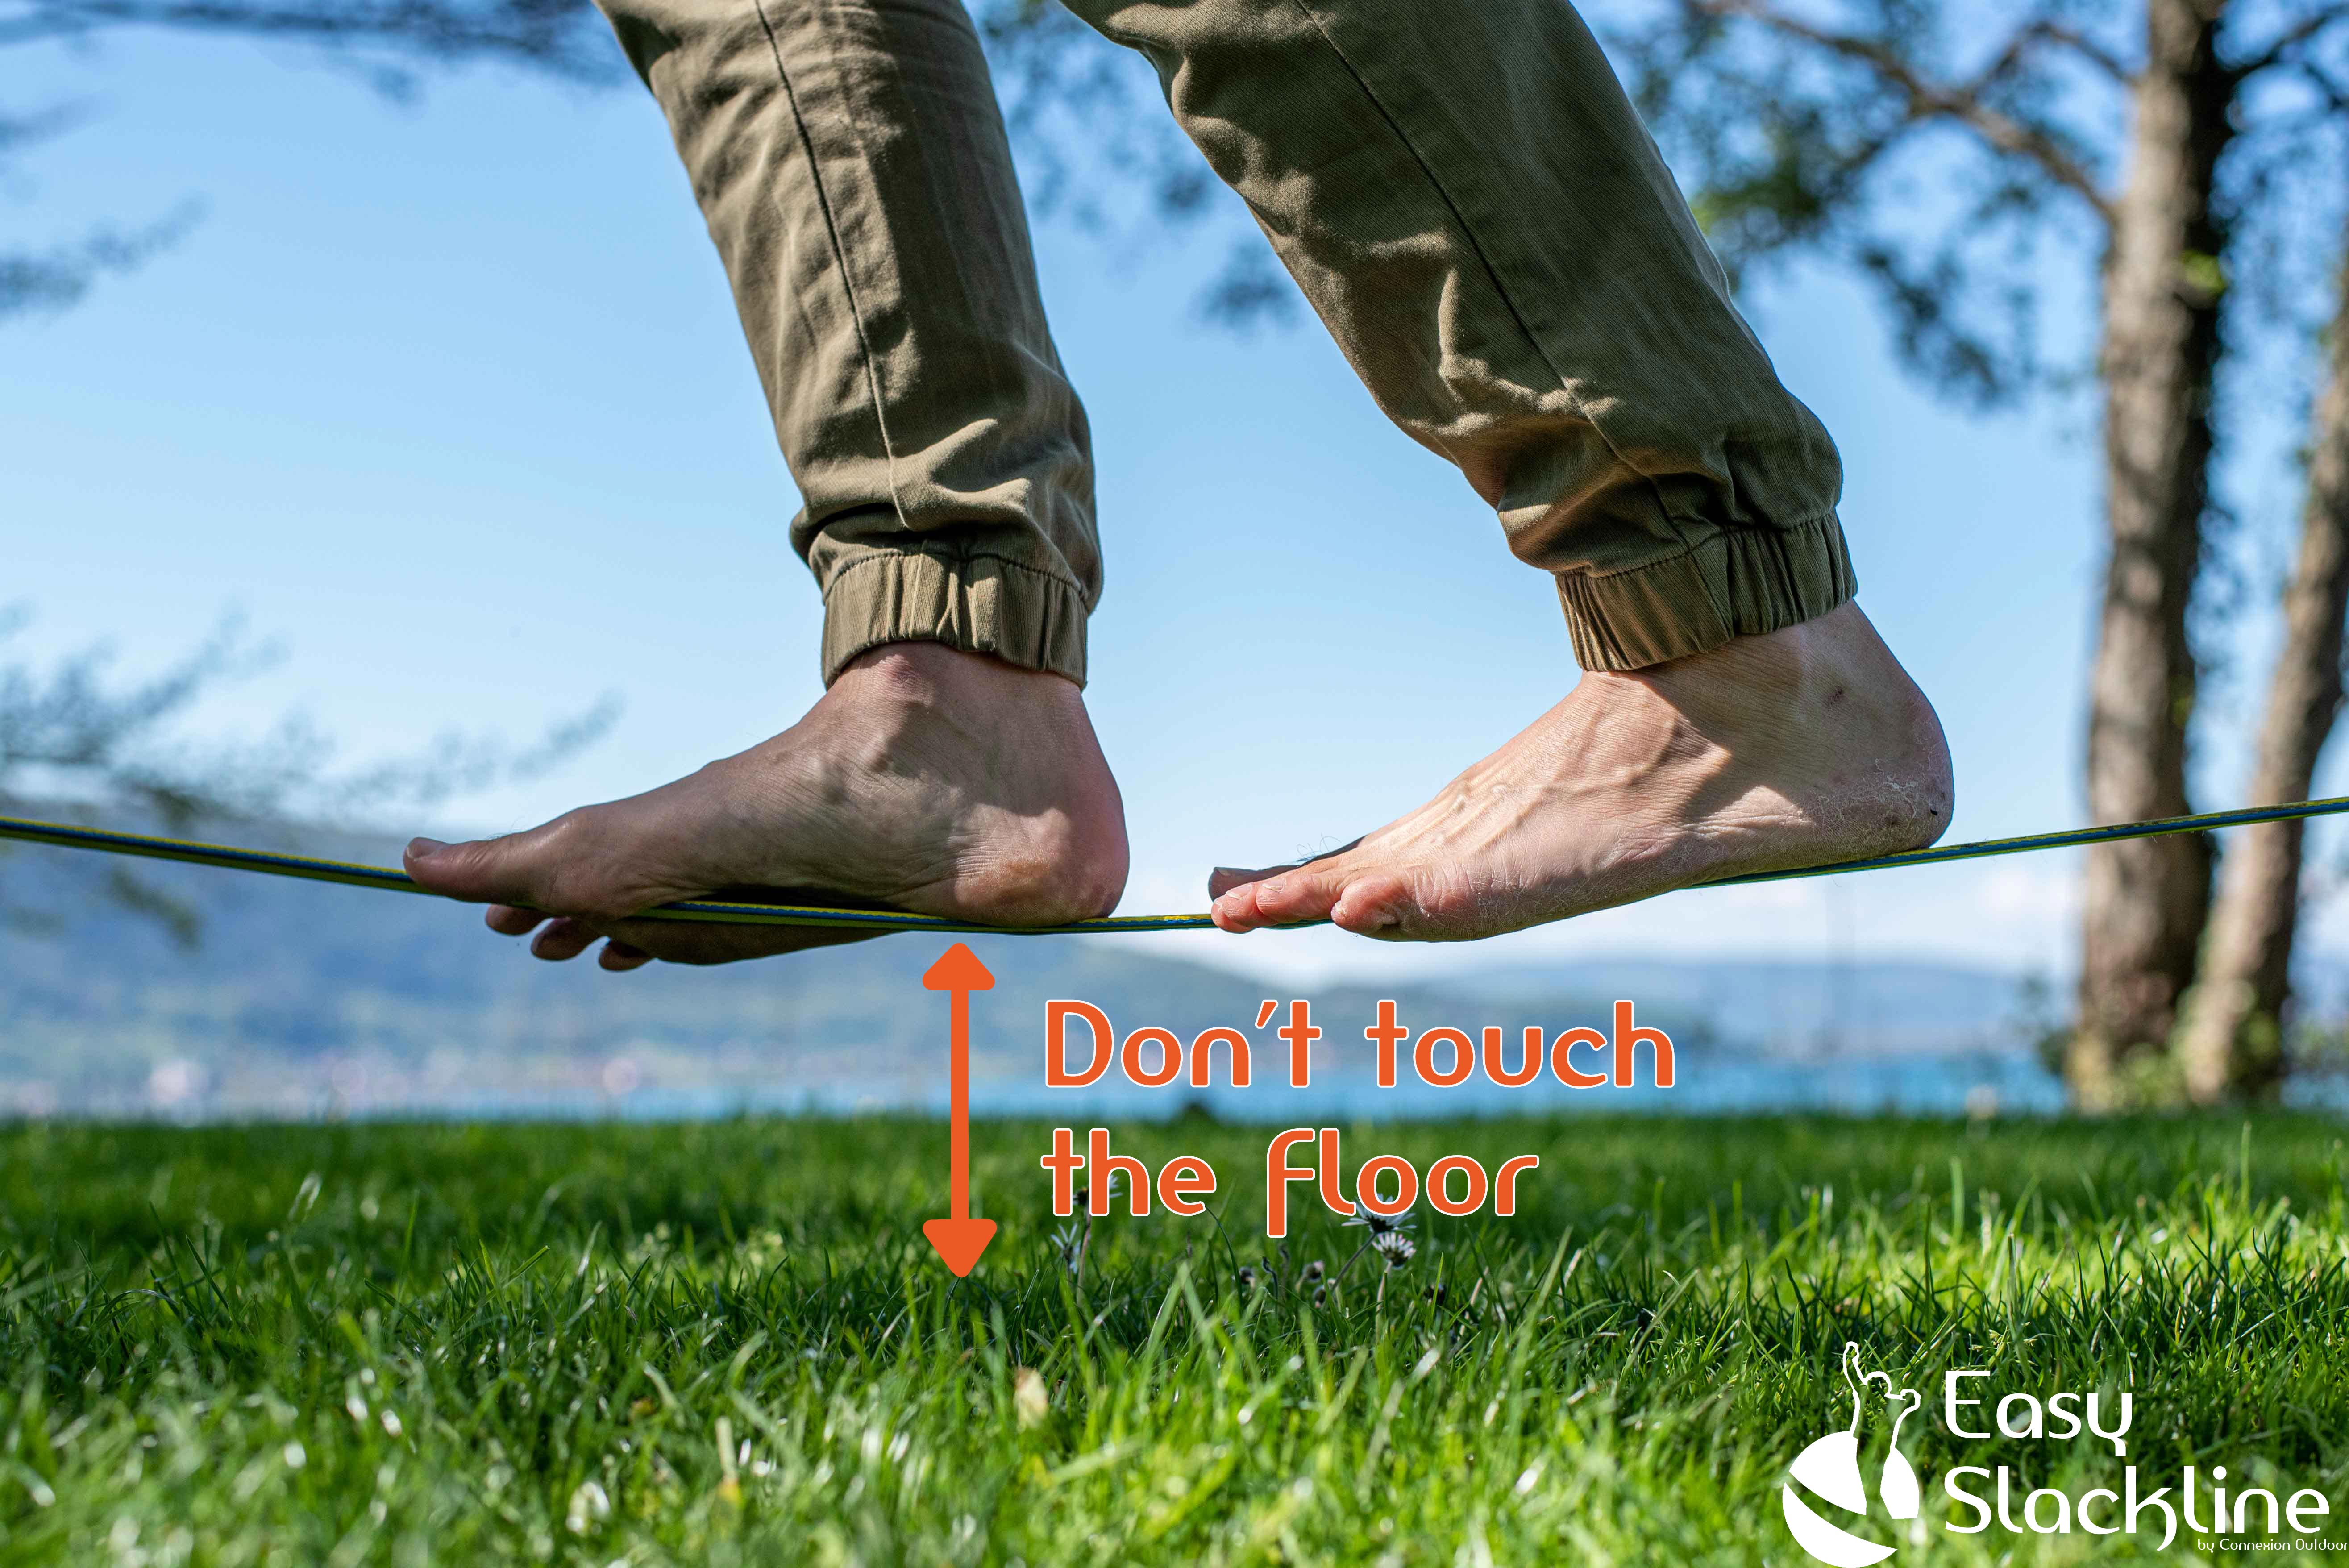
It seems obvious, but don't install the slackline too high and stop stretching once you don't touch the ground in the middle. No need to stretch like a cable, a slackline, by definition, is a kind of rubber band: it moves :-)
A slackline is not like the wire on which tightrope walkers walk, the tension makes it elastic. To reduce the movement of the slackline as much as possible, at the beginning, don't hesitate to stretch it over a short distance.
You can stretch it pretty tight (but don't be a bully either, the goal is not to rip out the trees :p ). In the middle of the slackline, if you don't touch the ground anymore, it means that the tension is good.
If you feel that you are comfortable on 4-5 meters and you want to increase the length of the slackline, you will have to increase the height as well (otherwise, you will touch the ground once in the middle).
As an indication, here is the ratio length/height generally found (for a person of average build):
- Length: 5/10m → Height: about knee
- Length : 15m → Height : about thigh
- Length: 25m → Height: about hip/belly
- Length: 35m → Height: about chest
- Length: 50m → Height: about shoulder/face
Which slackline equipment should I choose for a beginner?
Slackline, long or short ?
For those who have never practiced slacklining, a 15 meter long kit will be enough. You can stretch between 3 meters and 15 meters max.
For those who have already mastered the 4-5 meter crossing (having already tried it with friends for example), you can go directly to a 25 meter long kit if you feel like it - but not mandatory.
Buy a 15m long kit But a 25m long kit
Slackline, slim or large ?

An urban legend says that it is easier to balance on a wide slackline (50mm wide) than a thin one (25mm wide). THIS IS TOTALLY FALSE! However, wide slacklines are still recommended in some cases.
For children and families, a wide slackline allows to better compensate for footing errors. It also and especially hurts less in case of a fall or when playing on it (lying down, bouncing, sitting, etc.).
With the wide slackline, it is more the playful effect that plays. Technically there is no difference for learning.
And on more than 15/20 meters, the wide slackline even becomes a handicap because it will roll under the foot, while the thin one will be centered naturally.
For any other situation, even for teenagers and adults who have never tried it, it is better to take a thin slackline. It will naturally be centered under the foot. Also, it is much lighter, and will tend to shake much less than a wide slackline.
Buy a large slackline kit But a thin slackline kit
Tensioning system, ratchet or primitiv ?
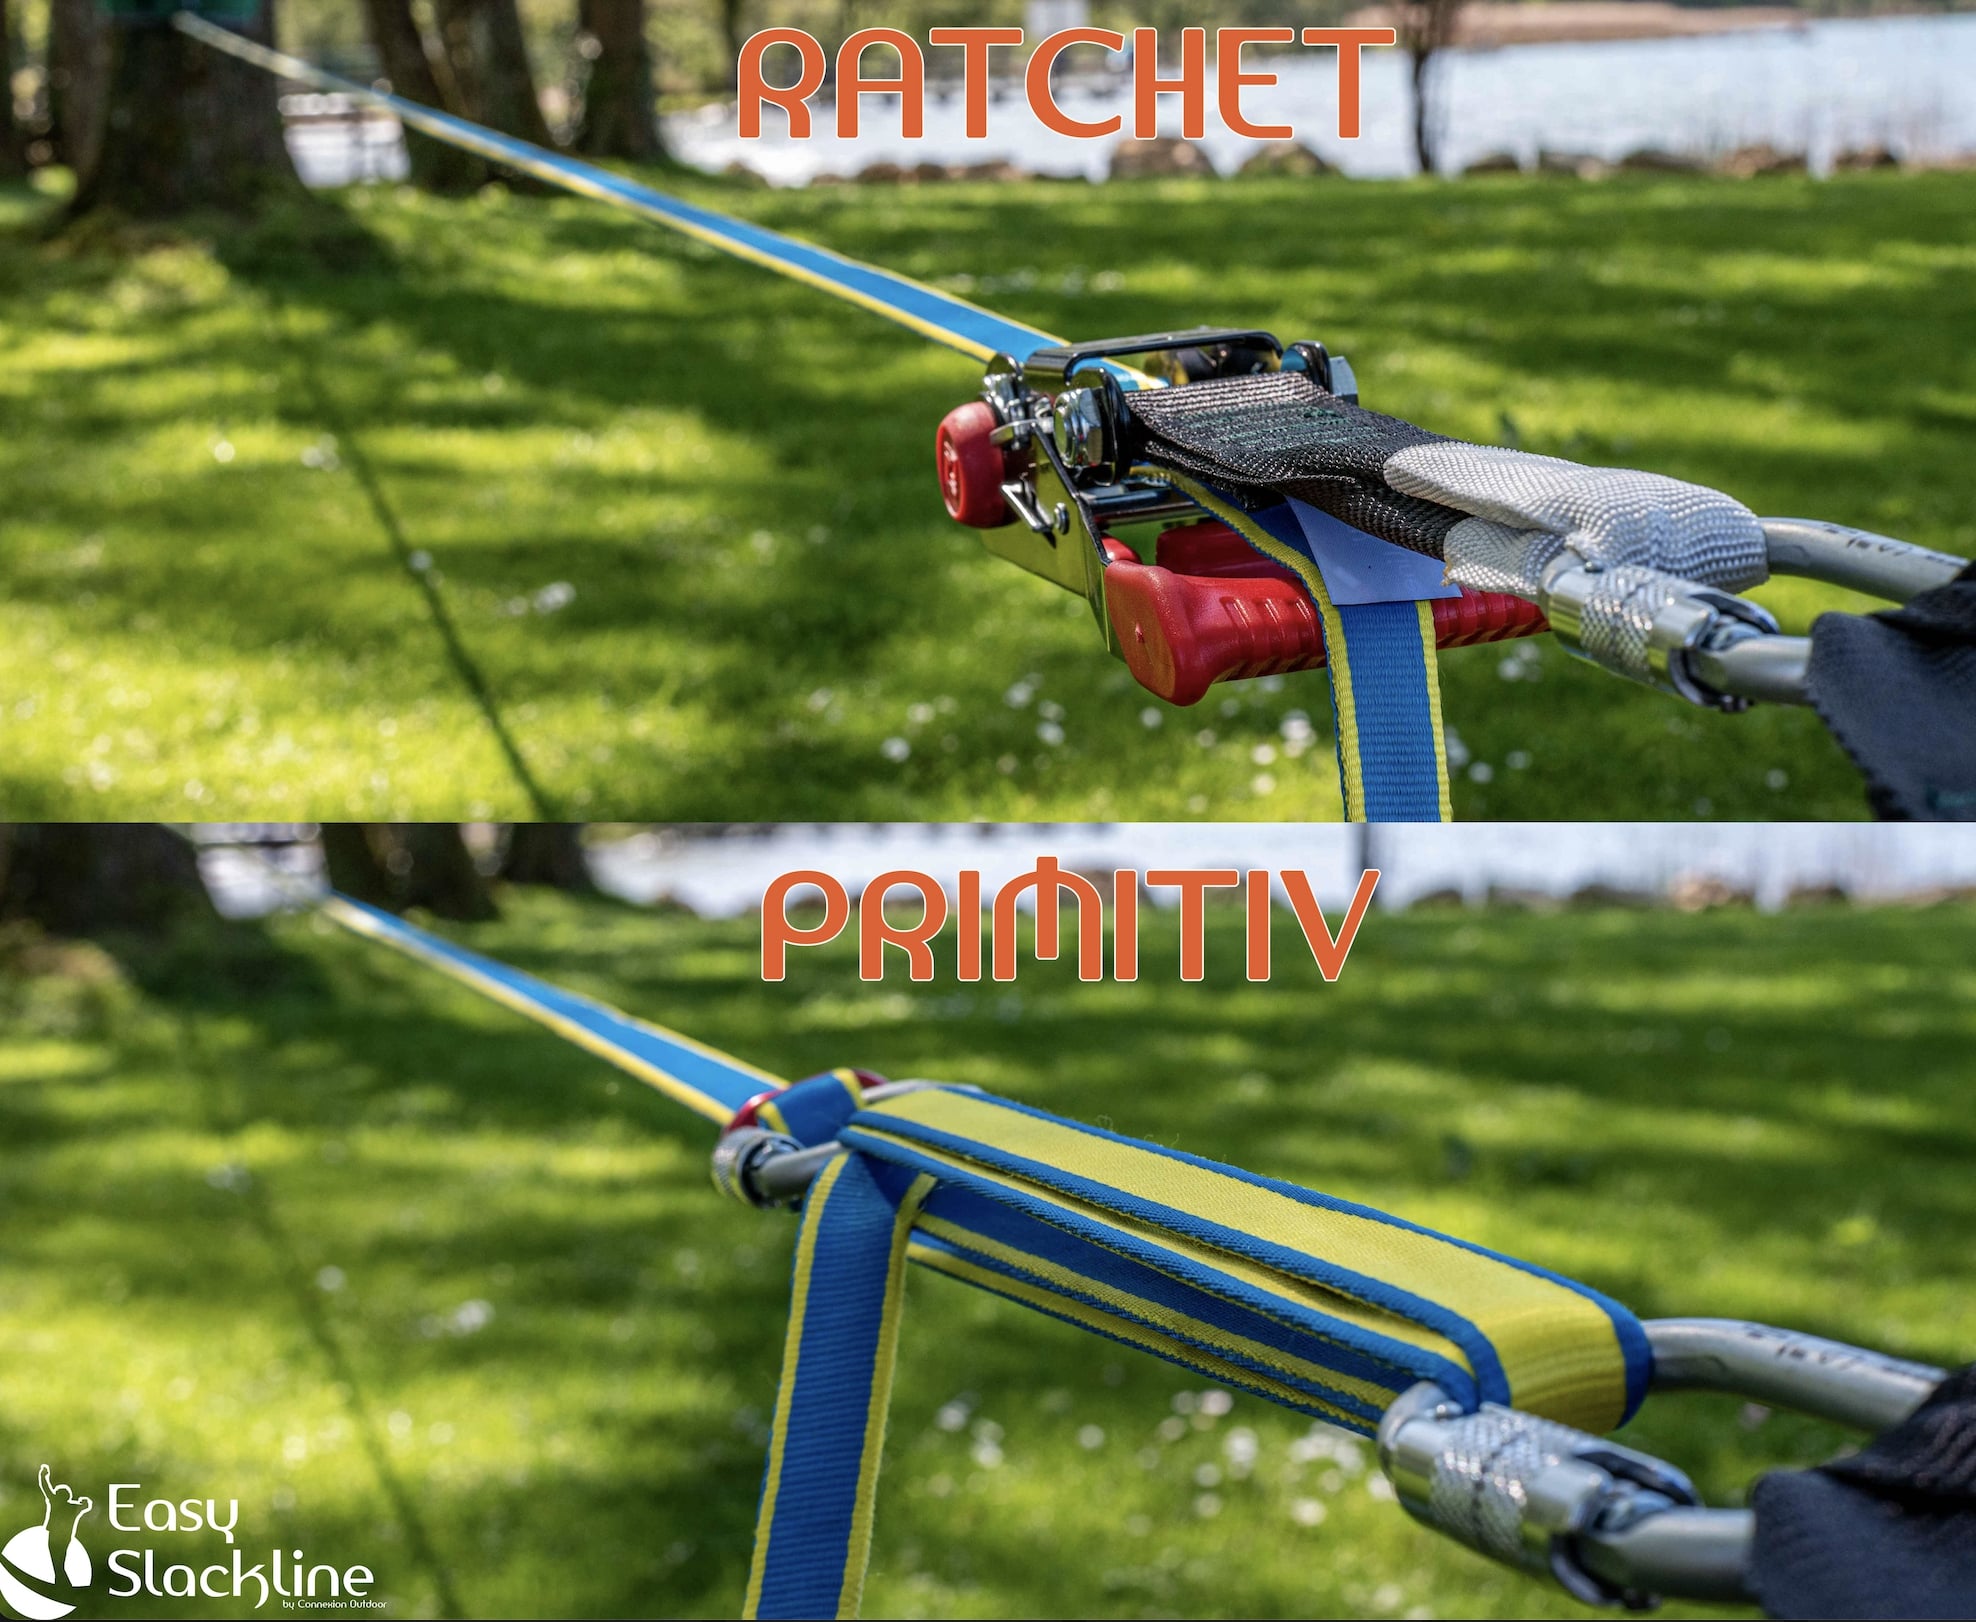
Regarding the choice of tensioning system, you can do pretty much the same things with both. Here are the few characteristics that differentiate them.
- Ratchet system
- Very easy to install
- Easier to tension over 15-20 meters
- Maximum length of slackline that can be stretched by upgrading the kit: 35 meters
- Heavier and bulkier than a primitiv system
- Primitiv system (with carabiners)
- Seems more complicated to install at first but after 2-3 tries, very easy to install (PDF and video instructions are there to help you)
- Slightly less tension on 15-20 meters than with the ratchet
- Maximum length of slackline that can be stretched with the kit: 50 meters
- Lighter and more compact than a ratchet system, it is ideal for those who want to take it everywhere in the backpack
What about tree protections ?
Beginner or not, tree protections are a must every time you practice slacklining.
Tree protections protect your playground - the trees - but also your equipment from premature wear and tear!
For more information on this topic, we invite you to check out the article "why using tree guards?"
My first steps on a slackline: which positions ?
Feet
The feet must be in the direction of the slackline. The goal is to keep your shoulders perpendicular to the slackline. This is impossible to do if your feet are crooked.
And most importantly, don't look at your feet! Even if you have just had your manicure, it is better to look at the tree in front of you, which gives you a reference point in the axis of the slackline. This allows you to stabilize yourself better.
Shoes or bare feet?
Try both, and do it your way. It's a matter of feeling. It's not harder or easier with shoes.
But if you prefer to have your feet protected, then choose shoes with thin, flat soles, no heel and no cleats.
The body
"Hands in the air !"
It is important to keep the arms in the air to balance. For the children, we will tell them to "do the plane".
Stand up straight
It is also important not to lean forward and to stay upright. It is at these times that the risk of falling is greatest.
Keep your chin up, your back straight, your legs slightly bent, your buttocks tight and your chest out: look proud!
It is the buttocks and hips that mainly direct the balance on a slackline, the arms are there to compensate and will position themselves naturally.
For example, if I feel that I'm going to the left, I'll swing my hip to the right to rebalance myself and find my balance point (the arms will naturally follow).

Take your time
As a famous French poet said, "there is no point in running, you have to start on time".
If you want to go too fast, you're bound to fall. However, it is important not to remain static and to always move forward (but slowly).
Standing still makes it more difficult to manage your balance, whereas movement helps you to stabilize yourself. A bit like riding a bike!
But we repeat, keep control, do not move too fast on the slackline.
Breath !
In a state of great concentration, we often tend to forget to breathe. It is however essential to continue to supply your muscles with oxygen and also to relax.
Just think about breathing, you will end up breathing in naturally.
Ask for help
Slacklining has a very large and active community that loves to share around this sport. It is not uncommon to see slackliners meeting in parks to spend an entire afternoon slacklining together. Why not join them?
To find slackliners communities in your city and around you, there are many websites, applications, facebook page, interactive maps that allow you to easily locate the spots but also the communities around you. Or you can simply do a search on the internet by typing "your city + slackline".
This interactive map gathers many communities and many places of practice, everywhere in the world.
Despite all these advices, I still can't make it...
Don't panic! It's way too early to get discouraged. Here are some tips according to the problems you may encounter.
- My slackline and/or my legs are shaking too much
- It is not the slackline that moves but your legs. In this case, it is probably the length of the slackline is too long for your current level, it is better to stretch a little shorter.
- I am stuck after 3-4 steps
- Try tighting the slackline a little shorter
- Try tighting the slackline to a lower height
- Start from the ground, without holding on to the tree (so you don't get off balance) or to a friend (so you don't lean towards him)
- Take more rest between 2 attempts by stretching your legs. This will help you relax
- Focus on exhaling rather than balancing
- Change direction on the slackline, or even change the location to change the visual universe. This sometimes helps to find a more suitable reference point for yourself.
Related products
-

Why using tree guards in Slackline ?
Read more
Published : 04/06/2021 10:06:53